Monday, June 20, 2016

DIY chain tensioners

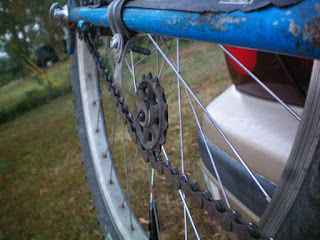
   Keeping your chain tight is the cassette is paramount to smooth running drive train. "Tighter is righter."  For a bike with vertical dropouts, the best way to keep your chain taught is with a chain tensioner. A standard chain tensioner looks like this:

Old reliable

   In the absence of a normal tensioner, cyclists have had to create something to keep things moving forward with whatever is laying around. Lets start at the top and work our way to the most... creative.

1. This is a simple hack that uses the quick release axle as a mounting point. probably needs to be adjusted a lot since gravity is working against you. And you better have your skewer tight! Score: 6/10

Tensioner #1

2. This is interesting because it mounts on the inside of the frame. Same issues as above but it looks a little cleaner. Score: 7/10

Tensioner #2

3. Good 'ol yankee ingenuity! This is an open ended wrench re-purposed into a tensioner. The open end of the wrench is bolted to the derailleur hanger, so probably needs to be very tight. Score: 7/10

Tensioner #3

4 & 5. The next two are more like chain guides than a standard tensioner. But they do keep the chain on, and they are hack-tastic. One is metal pipe hanging tape and the other is a short piece of garden hose, an extra point for simplicity. Combined Score: 8/10

Guide #4

Guide #5

6. Next come the chainstay mounted tensioners. These are mounted under the frame and can be used with or without a derailleur. This one looks pretty professional, minus the zip ties. Score: 7/10

Tensioner #6

7. We are getting away from civilization. This is a clamp and some bent metal. Than bent metal probably provides a little springy-ness to keep the chain tight, even if unintentionally. I do appreciate the rubber on the clamp to maintain the integrity of that bike (sarcasm).  Score: 6/♧

Tensioner #7

8. What problem can't be solved with a trip to the silverware drawer? Score: ♫/10  

Tensioner #8

9. Last, but certainly not least creative, this is an example of necessity being the mother or invention. Another testament to the structural power of dict tape. And they left the remains of the derailleur on there as a message to the other parts as to what happens to quitters. Score:  ♲/

Tensioner #9

Friday, June 17, 2016

Friday WTF: Beer Carrying

What a week ! Here are some clever ways to carry beer to take your mind off the heat:

Front rack

Rear rack

Top tube 6 pack holder


Growler cage

Bullitt bucket 'o beer!

Tuesday, June 14, 2016

Where Have I Been!? Vacationing!

   We have been in sunny Grand Junction visiting the grandparents, and in Glenwood Springs relaxing at a pool. Activities included:

Boat rides!

Pig rides!

Gondola rides!

Eating ice cream!

Sharing ice cream!

Swimming!

   Regular, boring bike related posts to resume tomorrow! 

Wednesday, June 8, 2016

Making the Commuter a 1X

   The Haanjo commuter has been a great bike. It gets me to and from work in efficient style. One of the only changes I've been considering is simplifying the gearing. Right now it is a 36/46 in the front and a 11/29 cassette. There is a lot of gear overlap with that set up, and I'd like to simplify things by changing to a single chainring in the front. I set up a spreadsheet to explore the possibilities and be sure I didn't short myself on gears. 

Gearing possibilities

   In addition to the high and low gears, I was curious about overlap, so I set up a list of every gear possibility. You can see here that there is a lot of overlap between the 36/46, with more than half the gearing options duplicated. The new set up give me less top end speed, but identical climbing flexibility while reduce gearing redundancy. 


All gearing possibilities

   I fretted over a 40t vs a 42t chainring, so I rode around in the comparable gear with my existing set up and tried to get a feel for it. I like the 42 because it keeps the climbing gear the same, but still gives me a decent top speed. 

The Parts! I sourced everything from Ebay for this build:

1. Chainring: I found this super cool looking Kingstar 110 BCD chainring. Cost: $24

No narrow wide :(

2. Cassette: The Pro's Closet had this great XT cassette just waiting for me to come pick it up. Cost: $13

11/34 Cassette

3. Chainring bolts: I'm an adult now and there's no cutting down long bolts. I splurged and got myself some ready made single speed bolts. Cost: $7

Single speed chainring bolts

   Here are all the parts laid out:

Not too bad

   The whole swap was a pretty standard affair:

1. Freewheel swap
2. Chainrings off
3. Break chain
4. Derailleur off
5. Chainring on
6. Fix chain
7. Shifter/cables off
8. Adjust and test ride

All done!

   One thing I hadn't counted on was clearance on the inner chainring position. Since I was going from a 36 to a 42, I should have been conscious about this gap. Luckily, things worked out.

Chainstay clearance

   So I saved a modest amount of weight, simplified things a bit, gained some handlebar real estate and had a fun time doing it! 

Monday, June 6, 2016

Sidelong Strider Carrier

   Calvin has been getting a lot of use out of his balance bike these days:

Valmont Bike Park

   He is getting better every time we ride! Up to now, I have been chaotically bungee cording the bike on the back of the cargo bike. This worked ok, but it wasn't great. I picked up this old roof tray for a steal on CraigsList and planned to cut and fold it so it would securely hold the little bike. 

SketchUp model

   It was surprisingly easy to get a straight cut on the tray:

Cutting the tray

   I bent the tray all together and then drilled and riveted the overlapping parts. It was pretty sturdy and keeps the bike in there nice and safe. 

Bench top test

   It's mounted simply on a piece of wood under the existing box. I used a couple carriage bolts and wing nuts so I can take it on and easy enough. 

Quick mounting

   And here it is all mounted up! I used a short bungee to hold the bike on, and it is pretty secure. 

All done!

   Next time we go for a ride, we'll be prepared to haul everyone back safely and easily!

Pilot view

Friday, June 3, 2016

Friday WTF: Safety Disclaimer

   All good advice...


Handwash only
Drip dry
No bleaching
No tumble drying
Do not iron
Do not eat
Please recycle

Thursday, June 2, 2016

Short Track + Things Riding Things

   I took my third 5th place finish in a row at Short Track this week, all behind different guys. Course was super fun, up the corkscrew and everything!


   Mike over at mikejoos.com has been coming up with some cool designs with things riding bikes. And I love bikes. And I love things! Check out some art here:

Cowboy on lassos

Gingerbread man on Cookies

Kiwi on kiwis

Man on apples

Warewolf on moons

Zombie on brains

   Purchase prints here: http://linedraw.storenvy.com/