Wednesday, April 30, 2014

Gulf Painted Bike

   The Ford GT40 was a high performance race car for racing in 24 road races. It is one of the more recognizable cars in racing history:

1968 Ford GT 40 Gulf

   This car is sweet and looks even sweeter. There has been quite a cult following for this car. Not surprisingly, people try to emulate the iconic paint. You can find just about any vehicle painted baby blue and orange:
Gulf Ducati

Gulf Fiat

Gulf VW Van

   Enter Gulf Bike dot net. These guys built a 1990 Koga-Miyata Valley Runner into a beautiful gravel racer / cruiser.

Frame

Complete bike

   Check out more on their site

Monday, April 28, 2014

Minivelo Bikes

   Tiny bicycles have been around for a long time, mostly for amusement:

The original mini bike

   Enter functional tiny bicycles: Minivelo bikes originated in Japan and Korea, where bicycle commuting is very common. They are a combination of 20" wheels and standard geometry. These are bikes that have acute handling, fit in small places, and are light weight. This all adds up to a great city bike. These bike are available from economical:

Mercier Nano - $300.00

   ...to the excessive:

Bianchi Mini Velo - $8000.00


     To the agressive!

Cannondale Hooligan - $1000

   The market for these is blowing up. People looking for something capable bicycle for running errands and easy transportation in a conveniently small package. It's the bicycle version of of a VW Beetle. Check out more pics here.

Friday, April 25, 2014

Friday WTF: Solid Aluminum Full Face Helmet

   This is less of a WTF and more of a WTA... What The Awesome! As an advertisement for a new helmet, FOX or somebody had Asian ProSource CNC a helmet out of a solid block of aluminum. If you have a couple minutes, check it out:

CNC helmet


Wednesday, April 23, 2014

Freehub Rebuild

   Hot on the heels of the headset rebuild, I'm going to keep the road bike tech tips going. If you're like me, strange noises coming from your bike are a cause for alarm. My rear hub has developed a loud whirring noise when coasting. Sounded like I was being chased by an old dog. This means the freehub body needs some TLC. This is how you service a Mavic freehub body. First, I watched this video. The guy goes through it very clearly.

Tools necessary:
  • Chain whip
  • Cassette removal tool
  • 5mm and 10mm wrench
  • Isopropyl Alcohol
  • Q-Tips
  • Mineral oil (different hubs call for different lubricant)
  • Degreaser (like WD-40)
1. Remove cassette - using a chin whip and cassette removal tool, pull the cassette and set aside for cleaning

Chain whip and cassette removal tool

Dirty cassette!

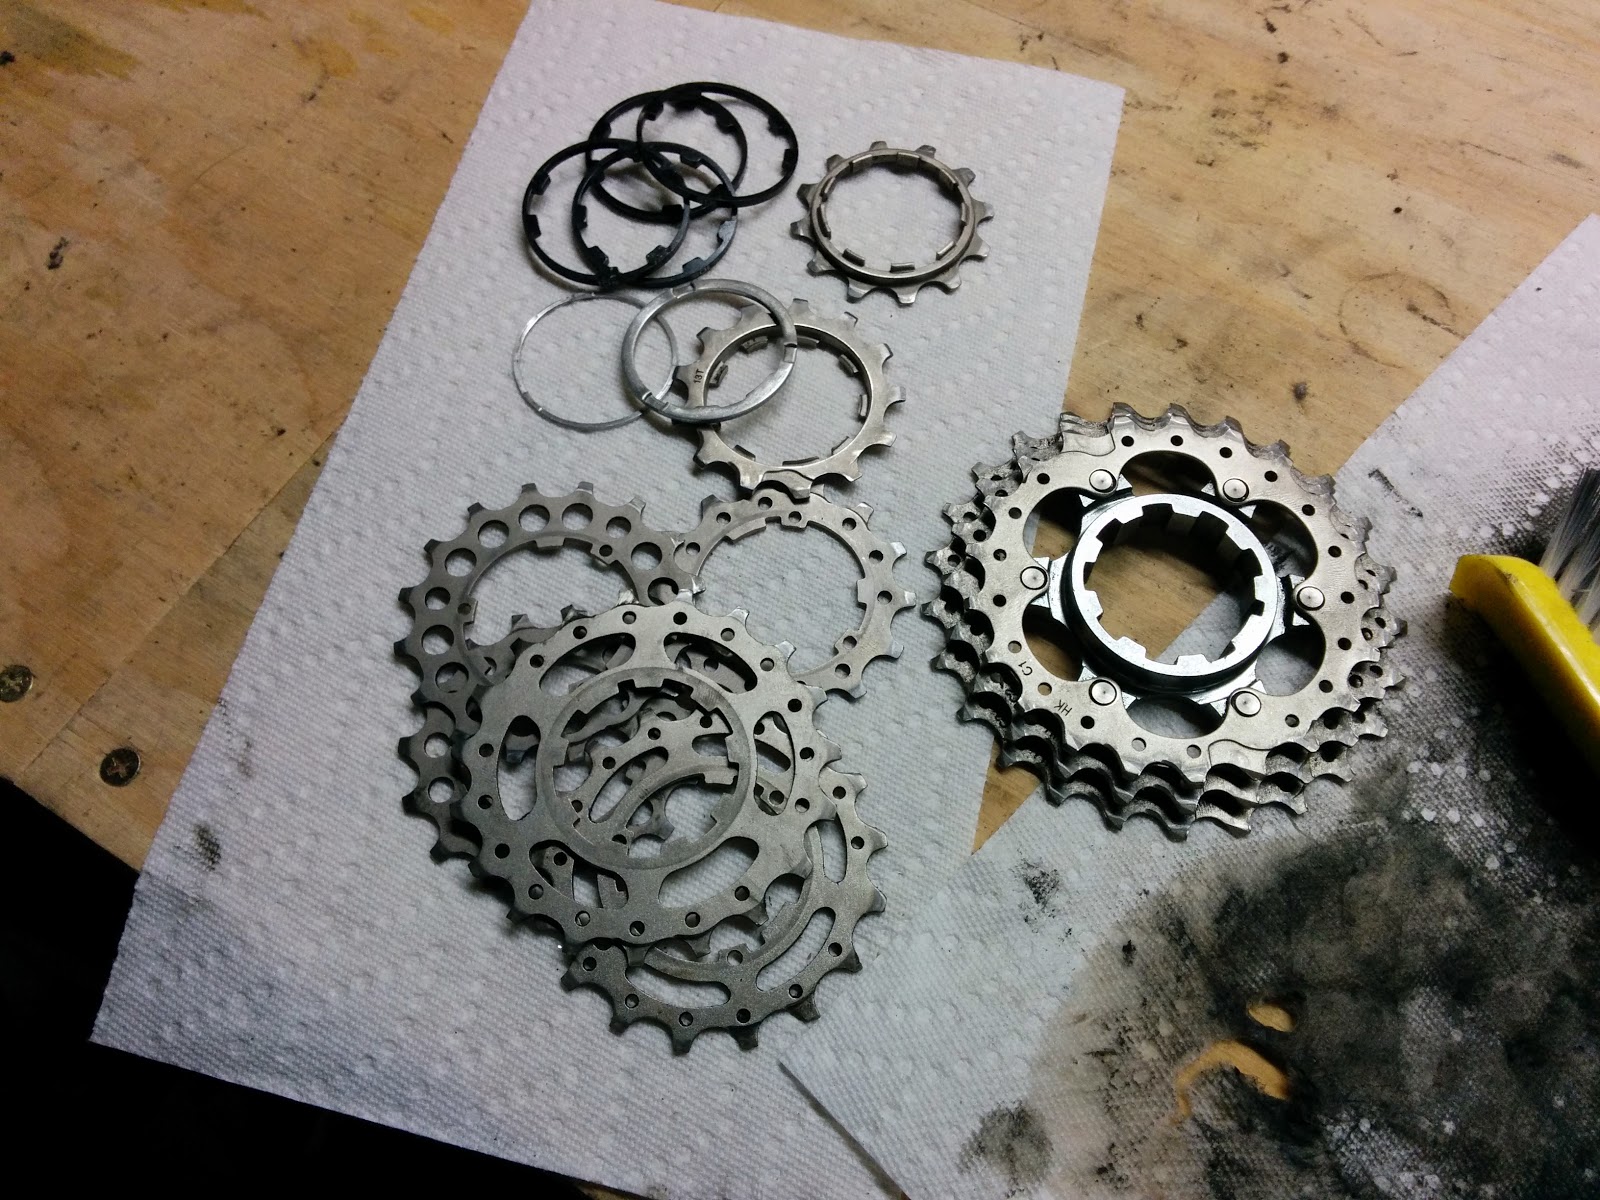
   Don't lose the spacers under the cassette!

Cassette spacers

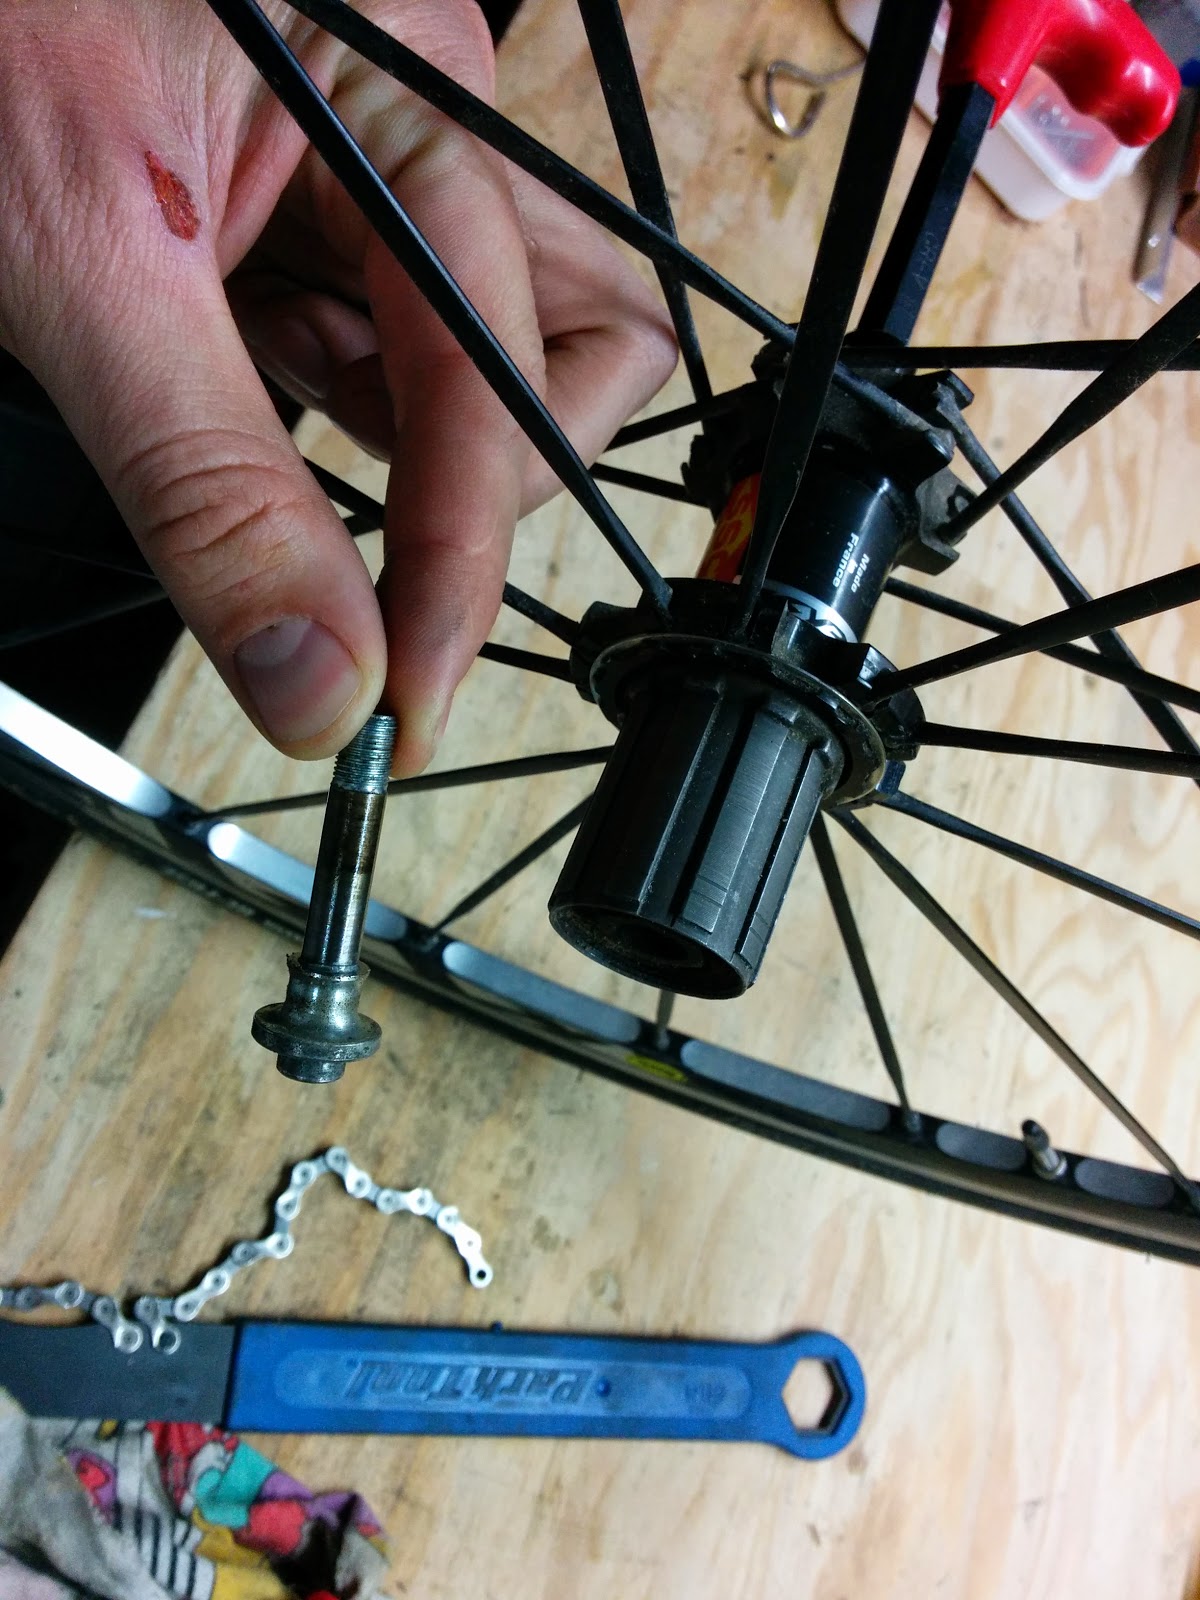
2. Remove axle - pop off the axle cap and set it aside. Using a 10mm wrench and a 5mm wrench, remove the axle. Set aside for cleaning.

Axle cap

Tools inserted

Drive side axle removed

Non drive side axle removed

3. Remove free hub body - be careful not to let the pawls shoot out, as they are spring loaded and under the free hub body.

Free hub body off

4. Remove hardware - remove the pawls, top washer and rubber seal.

One of two pawls

Top washer (Don't lose!)

   Take care when removing the rubber seal not to damage it.

Seal removed

5. Clean hub - using isopropyl alcohol and some Q-tips, thoroughly clean the hub. Dig deep into the hub to get all grit out. This grit will wear the hub and cause eventual failure.

Cleaning hub

Hub gunk

6. Clean hub parts - using a isopropyl alcohol and a paper towel, thoroughly clean and dry all hub parts. No part of the hub gets reassembled without being cleaned.

Clean hub parts

7. Lubricate the hub - place the pawls back on the hub. Put a few drops of mineral oil on the pawls and lower surface of the hub. You don't need to soak the hub, but get adequate coverage.


8. Put the rest of the free hub together - reassembly is the reverse of disassembly: Rubber seal, Pawls, washer, free hub body. Tighten the (cleaned) axle snug. It doesn't have to be balls ass tight.

9. Clean the cassette - spray the cassette with a solvent (WD-40 or something) and thoroughly wipe free of dirt and grease.


10. Install cassette - once the cassette is installed you should feel much less play and hear no more howling noised when coasting.


   Your cassette is now clean of road grit and ready for many quiet miles ahead.

Monday, April 21, 2014

Creaking Headset Fix

   My otherwise bulletproof road bike has developed a strange popping noise when turning the handlebars back and forth. What is this sound? Beats the hell out of me, but here's how I fixed it.

1. Pull handlebars and stem off - I hung them from a bungee cord from the frame and avoided unhooking them entirely and having to redo my cables. Here is a shot of the top bearings:

Top bearings and upper race

   These are drop in sealed bearings that don't need much maintenance.

2. Remove bearings - take the bearings out of the cups. They aren'y pressed in or anything, so they come out easily.

Exposed bearing cups

3. Clean the bearing cups - wipe all the grease and dirt form this area. I reached pretty far into the frame to be sure I got it all. Also a good chance to inspect the inside for any nicks or dings.

Cleaning cups

4. Grease the cups - apply grease to the surface the bearings sit on. I used the amount shown.


   There is a beveled surface on the bearing where it rests on the frame. This is where you want to apply grease. I didn't apply a ton of grease as it can damage the carbon, only where the bearing will sit. This is the surface I'm talking about:

Contact surface

5. Clean off the lower race - the lower race was also dirty, so I cleaned and greased that as well. Same thing, I tried not to get and grease on the carbon cork or steer tube.


Dirty!

Clean!

6. Clean bearings - the bearings are sealed, so you don't need to grease them, and you REALLY don't want to de-grease them (with WD-40 or anything). Simply wipe them down thoroughly and inspect for any damage. These are pretty tough bearings and can handle a lot of abuse.


7. Drop the bearings back in - reassembly is the reverse of disassembly. Since it's an aluminum stem and a carbon steerer, it's important to not over tighten the bolts. You can see where the stem calls for 8-10nM on the tightening bolts. I set my torque wrench to 9 and it feels solid. It's good practice to tighten each bolt a bit so the stem clamps uniformly.

Torque wrench next to stem

   Got it all back together and the popping noise was gone. Ready for another summer of riding!

Friday, April 18, 2014

Friday WTF: Cargo... Scooter?

   With our recent purchase of a cargo bike, I have been on the lookout for other neat cargo bike related news. Enter Nimble Scooters. These guys build a scooter with a similar style as a cargo bicycle.

Cargo bike

Cargo scooter

   Their model is for people looking to carry groceries and small items on your scooter. They suggest you can take the scooter where you can't take a bike, like the grocery store. Both a cargo bike and a regular bicycle with bags are heavy and awkward. The Nimble Scooter is lighter and more manageable than a cargo bike and available at a lower cost.
   Take it to the job site:

"Build for industry."

   I see two problems with this thing, 1. The long and low build will drag on the smallest of bumps, 2. the cargo bike is hard to ride, a scooter seems like it would be twitchy and unstable. Still, I'd really like to ride one of these!

"Want to crash our way to yoga?"

Wednesday, April 16, 2014

RockShox RS-1 Follow Up

   I recently posted on the freshly released RockShox RS-1 inverted fork. This is a cool looking fork that boasts a lot of neat technology. Now that more information is coming out, we can see what the fork will do, cost, and weigh. It comes in a couple color options, I personally think the Diffusion Black is really sharp looking.

Black    Diffusion Black

   The quick and dirty:
  • Cross country focus
  • 29er wheel size only
  • Full carbon upper and lowers
  • 80mm, 100mm, and 120mm travel options
  • 1 1/8" to 1 1/2" tapered steer tube
  • 3.7 pounds
  • Retail $1865.00
   Some of the interesting technology:

Inverted design - One main draw with this design is that the seals are under the oil. This way the seals are always lubricated, resulting in greater small bump sensitivity.

New hub - They are calling a torque tube, which is an outer hub structure to stiffen the fork. The internal tube unites the fork legs creating a solid piece between the legs. This is great if it does what RockShox says it does, but kind of a bummer that it's proprietary.

'Maxle' hub and axle combo

Torque tube

Carbon upper and lower - Both the larger top tubes and the smaller lower tubes are carbon. This is to achieve greater stiffness without needing a double crown steerer.

Swappable guts - You can change the airshaft in this fork and change the travel form 80mm to 100mm to 120mm. The innards are the same as other RockShox models, although flipped to fit the new fork orientation. 

Some competitive comparisons:

Cannondale Lefty XLR Carbon: 100mm, $1400.00, 2.9 lb
Fox CTD: 100mm $850.00, 3.43 lb
Manitou Tower Pro: 80mm, $550.00, 3.74 lb
RockShox SID XX Solo Air: 100mm, $890.00, 3.7 lb
DT-Swiss XMM: 100mm, $1300.00, 3.3 lb

   In my observation, it looks like this fork is on the high end on price and weight. The performance will have to be what sets it apart until weight and cost can be trimmed. As a few forums have pointed out, this first iteration will probably result in some trickle down technology to more entry level forks. 

Monday, April 14, 2014

Depricated Shifting System Spotlight: Shimano Airlines

   Ready for a throwback? I'd never even heard of this technology, but apparently it made a brief appearance in the 2000: Shimano Pneumatic shifting. I'll give you a moment to let that sink in.

   Ready to go on? Ok.

A thrill indeed!

   Here is what the whole set up looks like:

Shimano Airline System

   Of course, normal cable shifting systems are run with, you know, cables. There are a few out there that stray from cables - the Shimano DI2 Electronic and even some hydraulic systems. Pneumatic shifting is a whole other thing.

   They were mainly used for downhill, as they weren't real light. The system included a remote air canister, usually held where the water bottle would be.


   The compressed air worked in leu of cables. The specially designed derailleur would shift based on the air pressure. While the system was a commercial failure, it was a good exercise for Shimano to see what was possible and what wasn't. 

Friday, April 11, 2014

Friday WTF: Bicycle "Advancement"

   Who keeps developing these things? Here's a roundup of some unnecessary "advancement" in bicycles.
   First off, you may remember the Treadbike, this is a treadmill that you can drive around:

Tread Bike

   This is the Rowbike, a row machine you can also drive around. 

Robbike

   The people over at Sculltrek weren't satisfied with the RowBike. You have to see this thing in action to really get what's going on.

Sculltrek

... in action!

   Don't like the treadmill? How about an eliptical with wheels? 


   How about a stair climber?